bicycling in the cold isn't that bad. the first few minutes are brutal and makes me seriously question why i even bothered biking. but after a while i begin to warm up and the frigid temperature becomes a non-issue. in fact, the more i bike, the warmer i get, to the point where i'm taking off my hat and gloves and unzipping my layers. i brought my metal hand warmer, the first time this season. i tucked it in a jacket pocket, giving me some additional warmth.
i don't like riding my bianchi anymore. with it's 24" wheels, i'm not traveling as far compared to if i was riding a 26" wheel bike. in the calculation i did early in the month, i figured out i'm actually traveling 7" less per revolution. as soon as the rear racks arrive i'm switching to either the trek or the ross bike (both have 26" wheels).
 from my house to haymarket is less than 4 miles, but it still felt like a slog. i was panting heavily and i could feel the muscles straining in my thighs as i pedaled to my destination. maybe i was still thinking wheel sizes because it didn't feel like i was going very fast. crossing the longfellow bridge is the hardest part, at least until i reached the center point, then it's a downhill ride along a narrow bike strip. the road crew actually changed the way you cross the longfellow from the inbound (cambridge) side. now the right lane is for right turn only, and for incoming traffic from memorial drive, at least for the initial stretch of the bridge.
 i was actually afraid haymarket would be closed this weekend due to thanksgiving. i was relieved to find it was still opened. about a quarter of the vendors did decide to take an extended holiday,
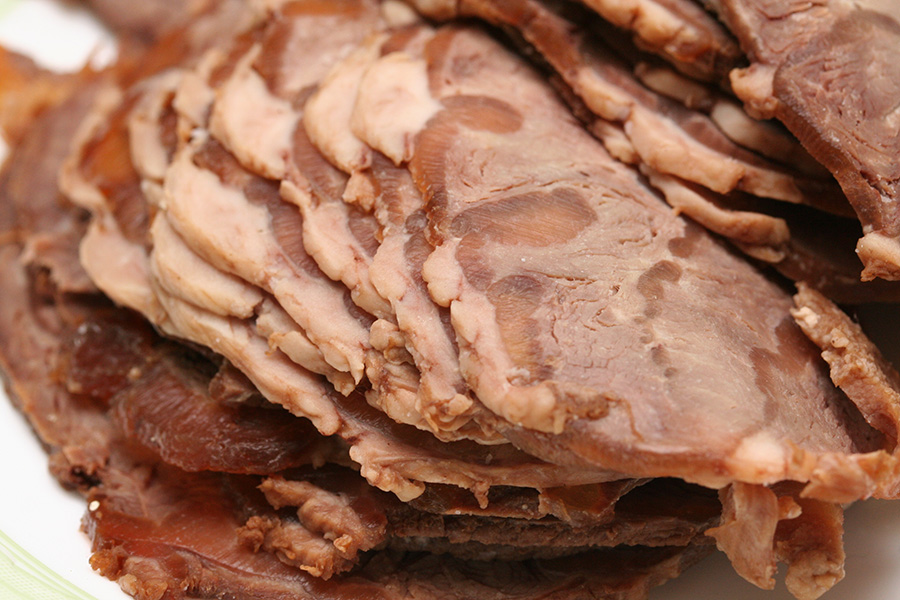
  evidenced by the empty stall spaces. close to wintertime there's less selection but still bargains to be had. my purchases: 4 cucumbers ($1), about 3 lbs. of beets ($1.50), 2 bundles of scallions ($1), 2 bunches of cilantro ($1.50), 2 pomegranates ($2), 9 persimmons ($3), a package of garlic (5 cloves, $1), a bag of red seedless grapes ($1), 4 lemons ($1), and a large bag of long green hot peppers ($1). all that for less than $20!
 on my doorsteps when i got home were a bunch of boxes. i left my bike with all my haymarket groceries by the side of the house so i could rush inside and inspect my packages. my two bicycle racks arrived, along with a new seat post, and 2 replacement snowblower slide shoes (for my father). i was tempted to install the racks but decided i'd wait. i gathered up my things and left, first to the cafe to drop off some stuff, then to belmont.
 i was all ready to get a taste of sewing, even going as far as bringing some old jeans that need alterations (e.g. broken zippers, denim rips). so i was surprised to learn that not only was there no sewing action, but that the sewing machine was still in the trunk of the car. when i finally took the machine out of the box, my sister set it up. just recently she got a sewing machine crash course at a needham tailor shop owned by a family friend.
like i mentioned before, it's been more than 2 decades since i last worked a sewing machine. "work" is probably a too generous description of how exactly i used it. i remember the foot pedal and the sewing needle bobbing up and down, but that's pretty much it. i knew somehow the thread is passed into the machine, but how exactly i don't remember. so when my sister prepared the machine, it was all new to me.
 |
 |
 |
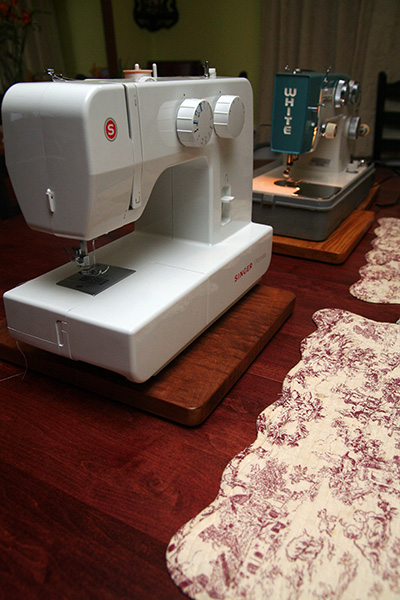
the sewing machine itself is the singer 1409 promise. it normally sells for $90 (from target) but my mother bought it as a black friday deal for $60. not sure if it's any good,  but at least i've heard of the brand before. on the box is a "handpiacked by martha [stewart]" label; not sure how i feel about that. i guess it's a good thing but she's been branding a lot of different merchandise these days, so the martha brand is a bit diluted.
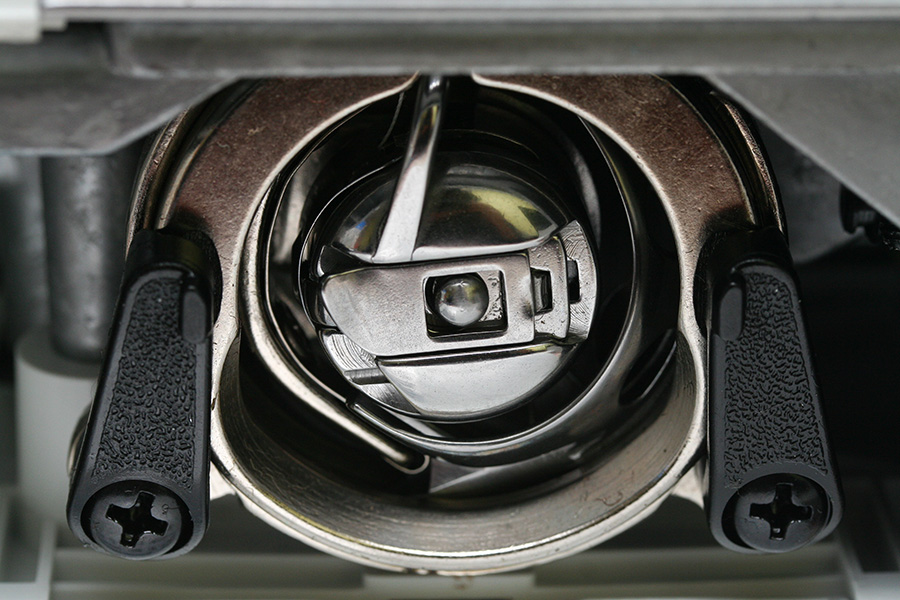
first my sister wound some thread onto a plastic bobbin. what for? i thought. it's cool and all, but why not just use the big spool of thread? turns out a sewing machine sews by using 2 lines of thread, one upper, one lower. i did not know that. the big spool is for the top thread, the bobbin is the lower one. the bobbin lives in a complicated-looking metal thing called a bobbin cage (AKA case) that lives underneath the sewing platform. now the upper thread can't just be directly spooled into the sewing needle; it has to pass through a series of guides before making its way to the needle. a sewing needle is different from a regular needle in that the eye is actually located close to the tip (as opposed to the end).
 |
 |
 |
 |
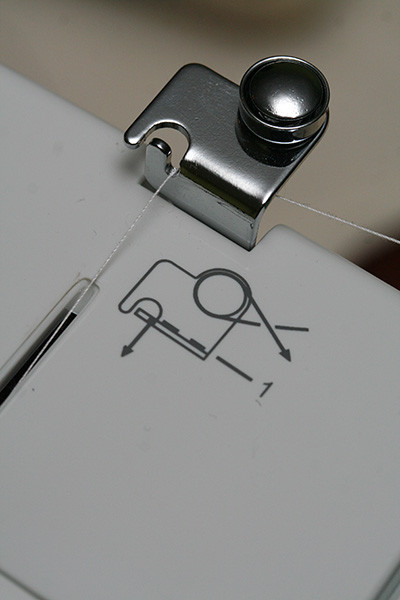
after threading the needle with the upper thread, you need to dip the needle into the needle plate platform using the big rotating knob on the side of the machine. when the needle comes back up, it should pull up the lower thread from the bobbin underneath. the 2 threads have to be long enough (about 6 inches) so they don't get pulled out during the sewing. luckily there's a handy built-in thread cutter on the side of the machine for just such an occasion. the final step is to lower the presser foot, which is this thing that looks like a short metal ski; it's job is to press down on the fabric and keep it in place.
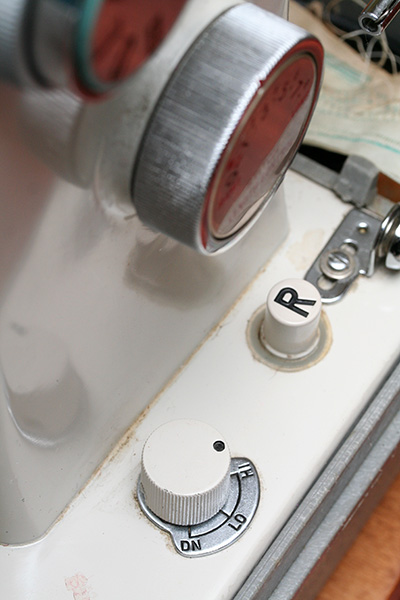
the needle broke when my sister used the machine for the first time. what happened was my mother pressed the presser foot release lever thinking it's the presser foot lifter lever. so when my sister began to sew, she actually managed to get a few stitches before the needle hit the free floating presser foot and snapped the needle in half. fortunately the machine came with 3 spare needles. i ended up doing some practice stitching on a piece of denim i cut from an old pair of jeans. i played around with the pattern selector and the stitch length dial.
this is one of those times when my mother knows more about a gadget than i do. she said when she was little she'd sneak into my grandmother's room when she wasn't around and sew herself outfits. my mother is actually quite crafty, experienced in knitting and rug hooking as well. i don't know why more men aren't into sewing. guys like machines, don't they? the sewing machine is machine as it gets! all gears and belts and cams and cranks. all the stuff i learned in mechanical engineering school but have now forgotten.
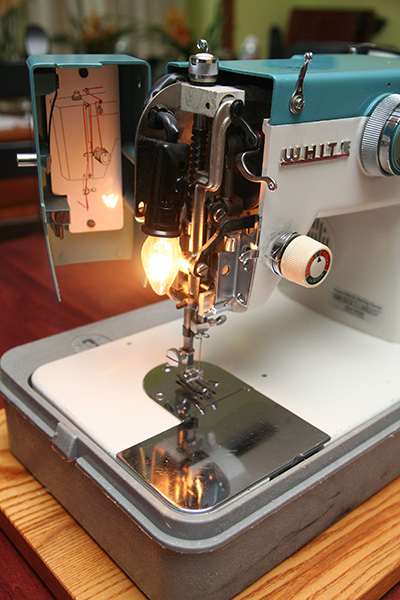
a few other cool things about the sewing machine from a newbie: there's a built-in work light when the machine is turned on. what a great idea! makes sense, because much of sewing is about working with little details that requires good visibility. another cool thing: the treads underneath the needle plate that pulls the fabric while i sew. another great idea! in my conceptualization of sewing, the fabric is moved manually by hand. but i think automatic fabric moving is standard, because otherwise you'd be sewing in the same spot if you don't move the fabric. also you would never be able to synchronize the stitching if the fabric movement isn't matched to the sewing.
what's the difference between a $60 sewing machine like the singer promise and a more expensive machine costing a few hundred dollars? i guess more features. i remember checking out a pricey sewing machine a while back that had over 100 different stitches. does anyone really need that many? i think all you really need is the standard dashed stitch (not sure what it's called) and the zig zag.
 inspired by some comments hillary made, i went down into the basement in search of my mother's old sewing machine. i couldn't find it, but instead i found this large and heavy box that i thought at first was a movie projector. turns out it was an old sewing machine given to my sister from a friend of hers. i lugged the thing upstairs.
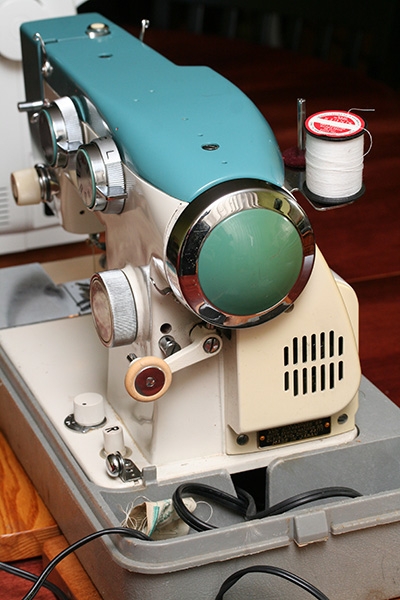
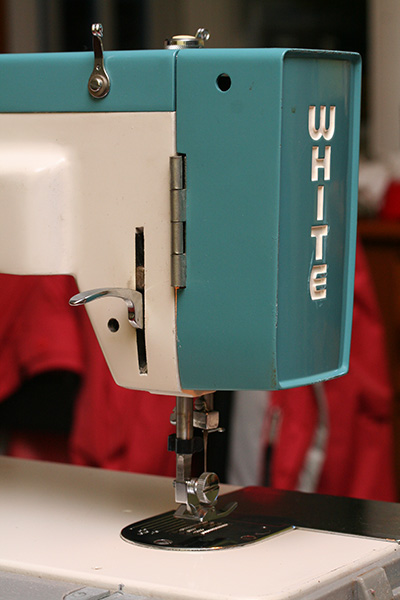
it was a 1972 white sewing machine. why it was so heavy i'm not sure, but it weighed anywhere between 40-60 lbs. because it came with a case it was in pretty good condition, and even included the manual. other than a few knobs, this machine was almost entirely metal, which probably explains the weight. there's a sticker for "vogue fabrics sewing center" of illinois, probably where this unit was originally purchased (i did some research, they still exist, even the phone is the same!).
 |
 |
 |
 |
 |
 |
 |
 |
 |
for a sewing machine that's nearly 40 years old, it was remarkably similar to the singer promise in terms of features. maybe i haven't seen enough sewing machines to realize what's standard and what's extra. it could either mean that this 1972 machine was ahead of its time, or the singer model has more "classic" features. even the iconography used to show the different stitch types are very similar. up until this point if you showed those to me i wouldn't know what they are, but now i do!
 |
 |
 |
 |
 |
i still prefer the singer promise over the 1972 white, if nothing else, just the fact that i don't need both hands and my back to carry the singer is reason enough. the white is a cool looking retro model, good if you have a strong table that can support all that extra sewing weight.
after dinner we removed a few leaves from the dining room table to collapse it to a smaller size.
 |
 |
 |
you'd think i'd be in a rush to get back home to work on the bikes, but i was too engrossed in sewing machine exploration and didn't leave my parents' place until 10:30, riding my bianchi bicycle (probably for the last time).
when i got back home it was almost 11:00. i figured i'd assemble one rack and then leave the other one for tomorrow morning. i went down into the basement and brought the trek 800 inside the house. first thing was to change out the seat post. immediately i realized it wasn't going to work. it was the right size (diameter), but it was still too long. i may get my father's help and try to trim off a few inches from the post, which is essentially a glorified piece of metal pipe with a seat clamp on one end.
i decided to install the rack on the trek 800 first, just because the ross bike was still partially disassembled on my dining room/kitchen floor. the one i got for the trek was a delta megarack ultra ($15.88). it only came in matte black, which was fine since the trek is black (although i would've preferred a glossy finish). unlike the other rack (a wald),  this one came disassembled and had to be pieced together before affixing to the bike. assembly was easy; attaching to the bike was hard. first, the eyelets on the rear frame of the bike seemed dangerously close to the sprocket cassette. i was afraid the screws from the rack would rub against the gearing cogs. when i finally screwed it on, there's still clearance but only by a few millimeters. next i had to attach the connector arms to the eyelets beneath the bike seat. everything's on sort of tight so i had to press and hold down the connector with one hand while turning the screw with an allen wrench with the other hand. once i got everything connected, something looked off. the rack wasn't horizontal, but slanted towards the seat. i removed the connector screws and tried again. this time i bent the connector arms a little bit downwards; even though they're steel, the metal is thin enough to be bent by hand when one end of it is securely attached to the rack. once i did that, it all fell into place and the rack was mounted perfectly.
i wasn't planning on it and was already preparing for bed when my obsession got the best of me and i decided to put the other rack on the ross bike. nothing like working on the bicycle in my underwear at 2:00 in the morning! first i had to put back the fender, followed by the rear wheel. the wheel was a challenge, to get it to seat correctly in the fender, 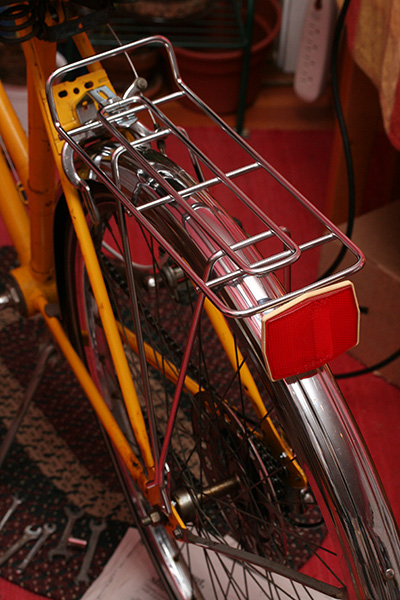 and also catch onto the chain, which were still dirty and left my hands like i was playing around in black ink. once that was down, i turned the bike rightside-up and went about attaching the rack. the wald rack ($18.98) came in chrome and arrived fully assembled (like welded together into a single piece). i knew from prior research that it'd fit the ross bike. the rack itself has a nontraditional mount, and wouldn't have fit any of my other bicycles. it only has 3 points of contact on the frame: 2 points near the rear axle and 1 point in a central spot behind the bike seat. the central post is also shared by the caliper brakes, which required some additional adjusting once i screwed on the rack mount brace. unlike the megarack, this single connector is hard enough that it can't be bent by hand. usually the rack as leverage, i pressed down on the connector anyway, until it came close to being horizontal with the socket on the rack.
with both racks finally assembled, i went to bed around 3:00.